INTERIOR AND EXTERIOR RESTORATION SETS
-
$111.00
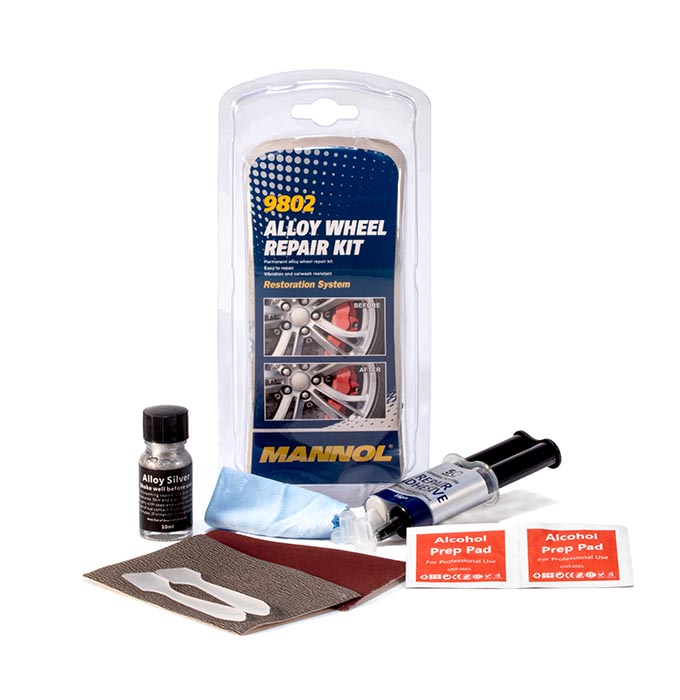
Alloy Wheel Repair Kit-a professional set designed specifically for the repair of light-alloy wheels made of aluminum and magnesium alloys, however, it is suitable for the repair of any cast, forged, stamped and composite automobile wheels, both from light alloys and steel, as well as for disks and wheels made of plastic. Suitable for repairing decorative caps and any other parts made of similar materials.
In the process of operation, the wheels are damaged: they are scratched and dented from hitting obstacles, fragments of the roadway, incorrect installation and tool damage during car repair and installation and dismantling of wheels. These damages can lead to end-to-end corrosion of steel disks and cracks in light-alloy and plastic ones, which can critically reduce their strength and ultimately lead to an emergency. Therefore, all disk damage must be repaired as quickly as possible.Properties:
– The kit includes everything you need to remove scratches and dents and restore the discs to their original appearance;
– Easy to use;
– The layer restored and painted with the attached varnish has a silvery color, if necessary, you can apply any other paint on it.Application:
1. Clean the damaged disc or cap from dirt and remove sharp edges and bumps around the damaged area.
2. Outline the recovery area. In case of minor damage, use wet sanding paper to smooth out the contours of the area being repaired and then easily paint it.
3. In case of large damage or holes, mix the restoring compound: squeeze the desired amount of it on the mat and mix both components with the included spatula until you get a gray mass (use the mixture for 2-4 minutes after which it hardens).
4. Repair: apply the mixture to the damaged area and leave for 15 minutes.
5. Clean the contour: use wet sanding paper to clean the contours of the restored area and level it with the surface of the disc. If necessary, repeat the second step.
6. Varnishing: clean and degrease the restored area (we recommend using 9691 MANNOL Brake Cleaner) and apply a thin layer of silver paint with a brush. The paint should dry for 1-2 hours before using the machine. The total solidification time is 3 days.The kit includes:
– restoring compound – 1 PC.
– silver lacquer (resistant to vibrations) – 1 PC.
– sanding paper (grain size: 1000) – 1 PC.
– sanding paper (grain size: 400) – 1 PC.
– cleaning cloth – 1 PC.
– gloves – 2 PCs.
– alcohol – impregnated napkins for preparation-2 PCs.
– plastic spatula – 2 PCs. -
$111.00
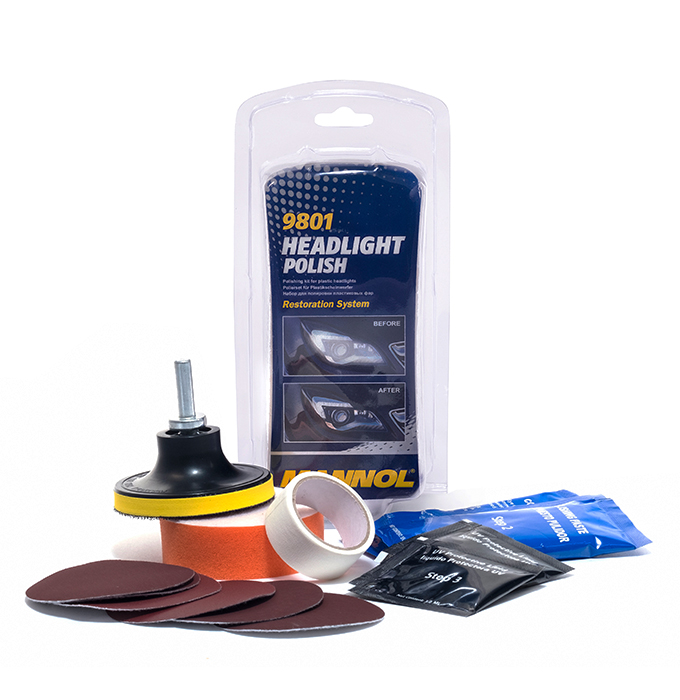
Headlight Polish-professional set for polishing damaged plastic glasses of all types and purposes. Designed specifically for manual and mechanical polishing of scratched, clouded or yellowed plastic headlights and other lighting devices without dismantling them, as well as windshields of motor vehicles and small vessels (boats, motor boats, jet skis, etc.) and motorcycle helmet windows.
Fragments of the road surface, dirt, salt and reagents, insects, ultraviolet light and other weather factors damage the surface of the headlights, making it cloudy over time and poorly transmitting light, which significantly impairs visibility. Therefore, the surface of the headlights must be periodically polished.Properties:
– Easy and fast application. On average, it takes 30 minutes to process a single headlight;
– Allows you to achieve an ideal degree of surface polishing;
– Restores the brightness of the headlights, increasing visibility and driving up safety and gives the car a more attractive appearance.Application:
Clean the surface to be treated with water. Use adhesive tape to protect the surrounding surfaces. Wet the surface and polish evenly in a circular motion. Follow the order of grinding wheels 800 → 1200 → 2000. Use each circle for a few minutes. Then polish with a polishing sponge (orange) and sanding paste until the surface is glossy and transparent. Clean and dry the headlight thoroughly. Apply a UV-protecting nano-sealant to the finishing sponge (white) and polish for 1 minute. Let it dry for 2 hours.The kit includes:
– self – locking sanding disc (for power tools) – 1 PC.
– grinding wheel 2000 – 2 PCs.
– grinding wheel 1200 – 2 PCs.
– grinding wheel 800 – 2 PCs.
– adhesive tape 3000 x 20 mm – 1 PC.
– sanding paste 40 g – 2 PCs.
– polishing sponge (orange) – 1 PC.
– sponge for finishing polishing (white) – 1 PC.
– nano-sealant that protects against UV rays (7.5 ml) – 2 PCs. -
$111.00
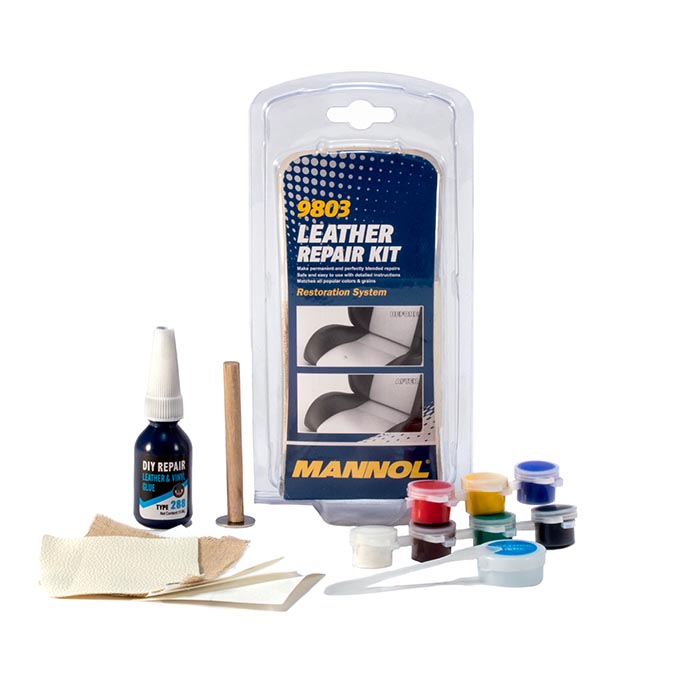
Leather Repair Kit- a convenient and easy-to-use kit for restoring surfaces made of natural and artificial leather and vinyl. It can be used both for the repair of car interior upholstery and panels, and in everyday life for the repair of furniture, leather clothing, shoes, bags and suitcases, haberdashery, as well as seats of boats, motorcycles and other motor vehicles, roofs of convertibles, etc.
Properties:
– Repairs any holes, cracks, cuts, burns on leather and vinyl surfaces, as well as dents on the latter;
– The kit includes heat-resistant repair compounds of seven colors, allowing you to get any shades when mixing. The shade corresponding to the surface to be treated can be selected using the attached table;
– The kit includes a set of three sheets of heat-resistant paper with the most common textures of leather and vinyl;
– The desired result is achieved without significant costs.Application:
1. Prepare and clean the damaged area.
Clean the damaged area with a household vacuum cleaner. Before starting work, make sure that the area is dry. Carefully cut off the worn places and excess threads, as well as the charred edges with scissors or a knife. When burning, remove all charred material. Give the place of damage smooth edges – you should get a hole in the material with smooth edges.
2. Insert the fabric backing under the damaged area. Use a spatula to push the fabric backing under the hole in step 1. To repair large holes larger than 6 mm, cut the fabric backing to a size slightly larger than the resulting hole. Use a spatula to smooth out the fabric backing. Glue the fabric backing on the inside with vinyl glue. Dry with a Hairdryer.
3. Choose a heat-resistant paper with the texture that best matches the texture of the damaged surface. On the back of the selected sheet of heat-resistant paper, draw the outline of the damaged area. This will allow you to correctly position the heat transfer point for the tool in point 8.
4. Repair deep damage. For deep damage, such as on a vinyl dashboard, use clear vinyl adhesive with filler and a spatula to level the damaged area to the original surface level. The glue will shrink slightly as it dries, leaving a void that will later be filled with a colored repair compound.
5. Using the table for the selection of color or empirically identify a set of repair compositions which when mixed will create the necessary shade. Mix this set in the required amount in the mixing container to get the desired shade. Check that the shade matches by rubbing a small amount of the mixture into the undamaged surface, then remove it with a cloth.
6. Apply the repair mixture. Once the vinyl glue is dry, use a spatula to apply the mixture evenly and gently to the damaged area. Wipe off any excess around the hole or damage. Do not cover the area of damage.
7. Place heat-resistant paper with the texture on the area to be repaired. Glue it on top of the repair mix, making sure that the marked contour is directly above the damaged area. Don’t move it. If the repair takes place on a vertical surface, secure the paper with tape on top.
8. Heat treatment. This is a very important stage in the repair process. Turn on the iron and let it warm up to a high temperature for at least four minutes. Place the tip of the heat transfer tool directly on the iron and allow a few minutes to warm up from the iron. Then press the tool against the working contour on heat-resistant paper and stroke the area under repair in a circular motion with a little effort for 20-30 seconds. Remove the heat-resistant paper from the repaired area.The kit includes:
Heat-resistant repair compound of seven colors (black, blue, green, red, brown, white and yellow) – 7 PCs.
Vinyl glue – 1 PC.
Fabric backing – 1 PC.
Set of heat-resistant papers with three different textures – 3 PCs.
Table for selecting a shade – 1 PC.
Spatula – 1 PC.
Mixing capacity – 1 PC.
Heat transfer tool – 1 PC. -
$111.00
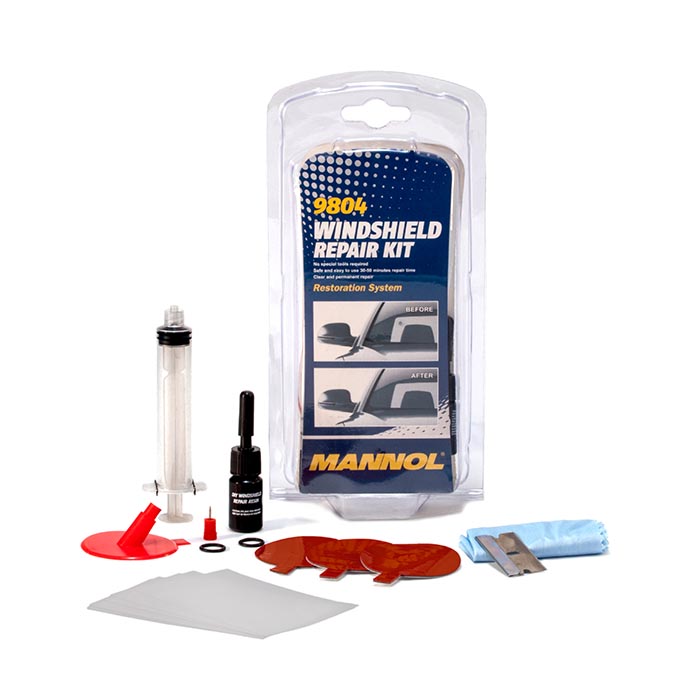
Windshield Repair Kit- a professional set for restoring windshields. Unlike other similar products, it does not require ultraviolet radiation. The principle of the kit is to remove air from chips and cracks, and fill them with a strong resin, which makes the treated area of the glass even stronger than before. To achieve the best results, you should make repairs as soon as possible after the damage. Before the chipped or cracked area is contaminated.
Properties:
– Minimizes the risk of cracks after a pothole or chip on the windscreen is cured and helps prevent them from spreading further;
– High-quality repair resin of extremely low viscosity reliably fills even the smallest cracks;
– Allows you to restore the windshield within 30-50 minutes.Application:
1. Clean the damaged windshield from dust and dirt with a cleaning cloth. For best results, it is recommended to degrease the glass surface around the chip using 9691 MANNOL Brake Cleaner.
2. Remove glass fragments from the damaged area using a special red button.
3. Install the adhesive disc so that the damaged area is located in its center.
4. Place a black o-ring around the edges of the hole in the adhesive disc. Black o-rings can be used several times.
5. Glue the red mushroom shaped base on top of the adhesive disc and insert 2-6 drops of repair resin from a tube depending on the degree of damage – the more rays the crack has and the longer their length – the more resin is needed to fill all these cracks.
6. Install the syringe in the mushroom shaped base, with the plunger pressed all the way down. Then pull the piston as far as possible, creating a vacuum under the piston. Wait for 10 minutes. Remove the syringe. Push the plunger back in and place the syringe on the base, then pull the plunger out again as far as possible and wait for another 10 minutes.
7. Remove the syringe, mushroom shaped base, black ring and adhesive disc. If necessary, clean the glass from the adhesive disc with a scraper. To put the repair resin into any remaining damaged areas and cracks. Cover the damaged area with the repair resin applied with a thermal plate. Smooth the thermoplastics with a scraper and a cleaning cloth so that it fits snugly against the glass and there are no air bubbles under it. Remove excess resin from the edges of the thermoplastics with a cleaning cloth. Wait 15 minutes.
8. Remove the thermal plate or scrape it off with a scraper. Also, carefully scrape the dried repair resin from the glass.The kit includes:
– Repair resin – 1 PC.
– Adhesive disk – 3 PCs.
– Red mushroom shaped base – 1 PC.
– Thermoplastics – 5 PCs.
– Scraper with a blade – 1 PC.
– Syringe with spring clip – 1 PC.
– Cleaning cloth – 1 PC.
– Red button – 1 PC.
– Black o-ring – 2 PCs.